Bun.Image
Bun 1.3.14 shipped a built-in image pipeline — zero npm deps, no native build, JPEG/PNG/WebP/AVIF and ThumbHash placeholders in one chainable API. Here's what it does and where it shines.
What’s new
Bun 1.3.14 (May 2026) shipped Bun.Image — a chainable, lazy image pipeline built into the runtime. Decoding via libjpeg-turbo / spng / libwebp, geometry via SIMD kernels, zero npm dependencies, no native addon build step.
What’s supported:
- encode + decode — JPEG, PNG, WebP, everywhere.
- decode only — HEIC, AVIF, BMP, GIF, TIFF, where the OS supports it.
- clipboard input — free on macOS and Windows.
The whole API is built around one idea: a fluent chain that stays lazy until you await a terminal call.
const bytes = await Bun.file("photo.jpg").image()
  .resize(800, undefined, { fit: "inside", withoutEnlargement: true })
  .webp({ quality: 80 })
  .bytes();
Nothing decodes, nothing encodes, nothing copies a pixel until you await .bytes() (or .write(), or .blob(), or any of the other terminals).
The chain compiles down, runs off the JavaScript thread, and hands you the result.
Why it matters
A few things stand out once you start using it:
- Zero npm dependencies. It’s in the runtime — no
bun add, nonode_modulesbloat for image work. - Same binary everywhere. Mac, CI, Linux ARM, Linux amd64. No platform flags, no native rebuilds, no Docker incantations.
- AVIF works out of the box where the OS supports it. No
libheif/libaomsetup. - Lazy by default. Nothing decodes or encodes until you await a terminal call, and the work runs off the JavaScript thread.
Response-ready. Pass the chain straight intonew Response(...)and the encoder owns theContent-Type.- ThumbHash built in. One method call returns a ready-to-use placeholder data URL. No extra package.
It’s the same shift Bun.serve brought versus reaching for Express: not new capability — the friction is just gone.
The demo
I asked Claude to put together a quick demo that exercises the API for real — four exercises: a format showdown, an on-the-fly transform server, a ThumbHash placeholder generator, and a macOS clipboard transformer. Repo: github.com/Nitzan94/bun-image-demo.
Demo 1 — Format showdown
Take one source image, encode it 7 ways, print a table.
source: samples/photo1.jpg  (753 KB, 3000x2000, jpeg)

format     size        time     vs jpeg-q80
───────    ────────    ─────    ───────────
jpeg q80   835.9 KB    34.1ms   1.00x
jpeg q60   707.3 KB    31.8ms   0.85x
png        3.95 MB    594.2ms   4.84x
png q256   3.80 MB    877.9ms   4.65x
webp q80   599.5 KB   300.9ms   0.72x
webp loss  2.51 MB   1173.6ms   3.07x
avif q60   505.4 KB   284.3ms   0.60x
AVIF at q60 = 60% of JPEG q80, and the encode time was competitive with WebP. PNG palette quantization barely helped on photos (expected — too many colors).
One useful surprise: re-encoding the source JPEG to JPEG q80 grew it from 753 KB to 836 KB. picsum had already aggressively compressed it; the “high quality” default added bytes back. Always benchmark before assuming higher q = better.
Demo 2 — On-the-fly transform server
A 120-line Bun.serve route that handles GET /img/<name>?w=&h=&fmt=&q=&rotate=&flip=&flop=&placeholder= — the kernel of an internal image CDN.
const out =
  fmt === "jpeg" ? img.jpeg({ quality }) :
  fmt === "png"  ? img.png() :
  fmt === "webp" ? img.webp({ quality }) :
                   img.avif({ quality });

return new Response(out);
Two things to notice:
- A
Bun.Imageis a validResponsebody. Pass the chain directly intonew Response(...)— the encoder owns the MIME type andcontent-typeis set automatically. Noheaders: { "content-type": "image/webp" }boilerplate, and switching format via query param Just Works. - The whole encode runs off the JS thread. Concurrent requests don’t block your event loop on a JPEG decode.
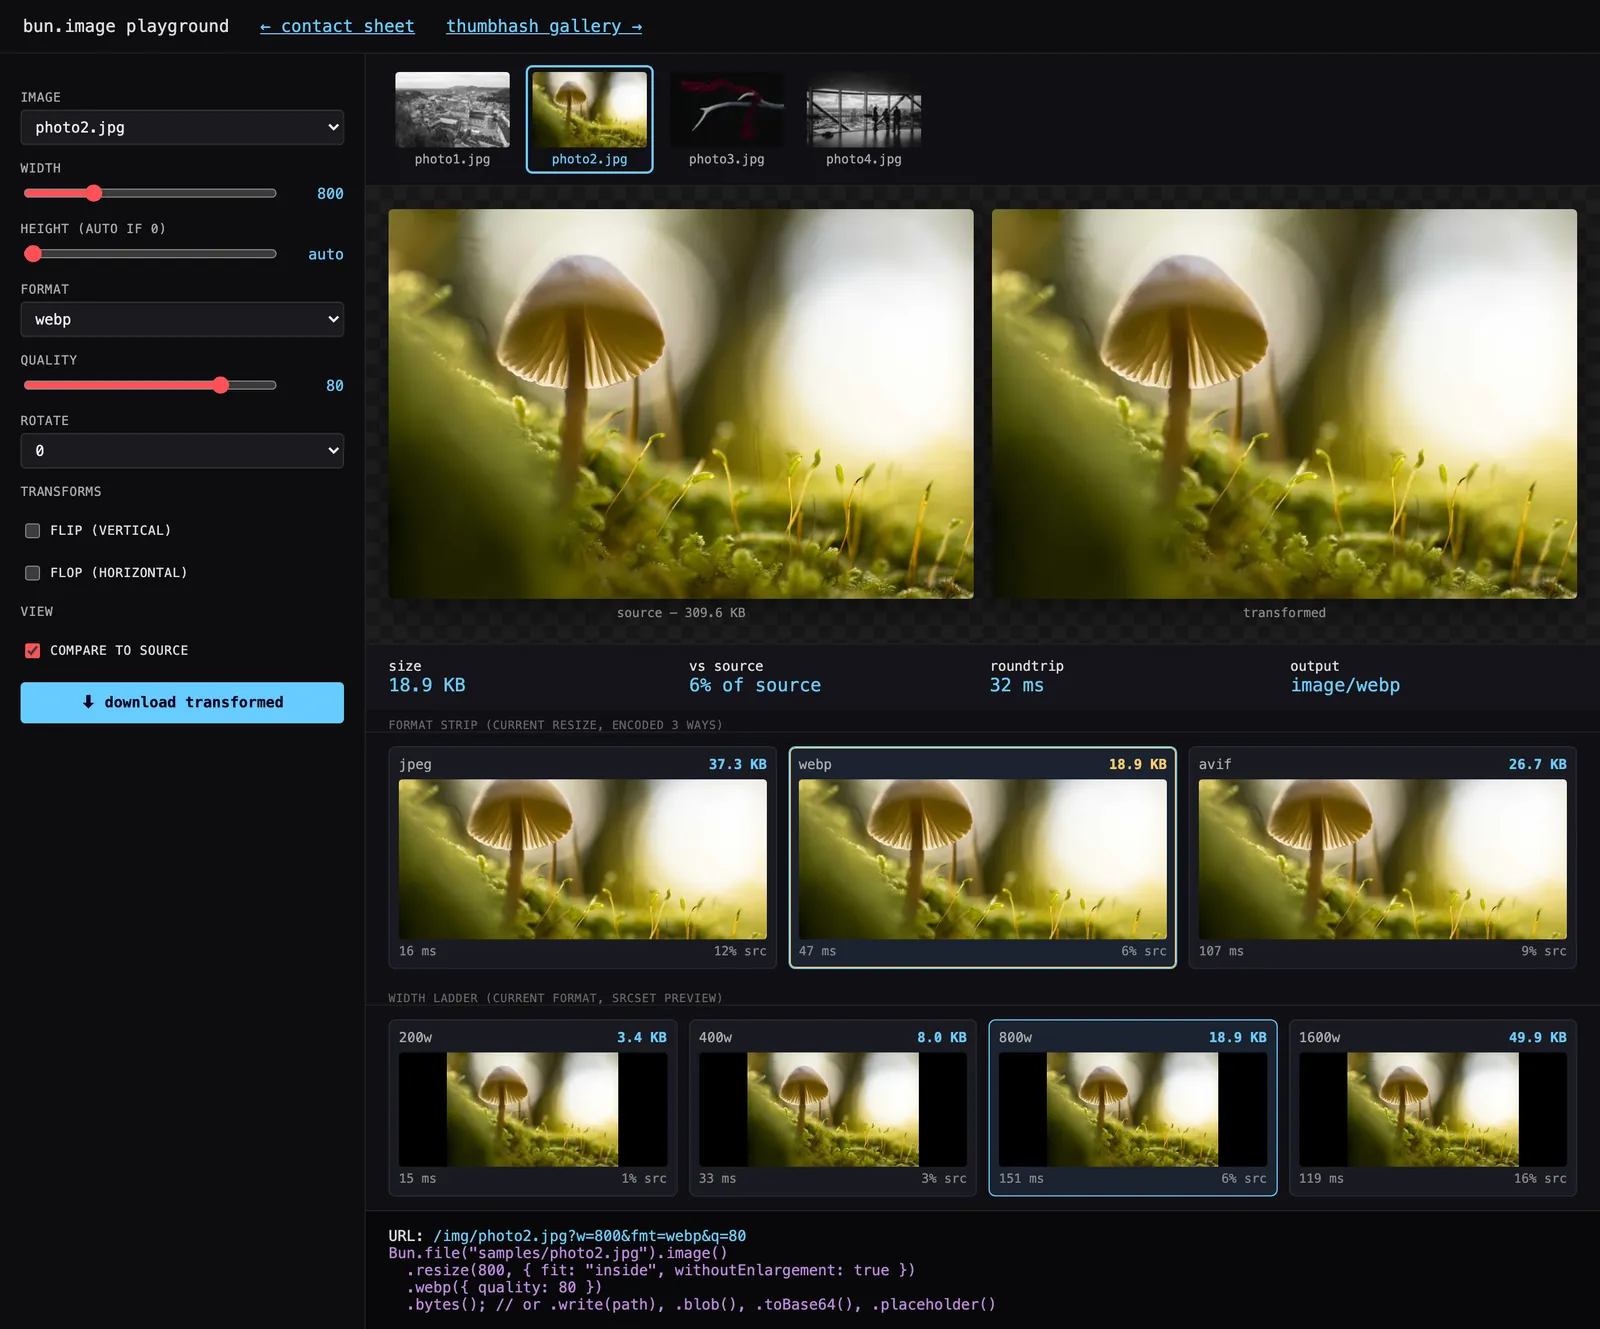
I also asked for a frontend playground that lets you drive every knob with sliders, see live size/time stats, compare to source, and snap to suggested format/width settings by clicking cards in a comparison grid.
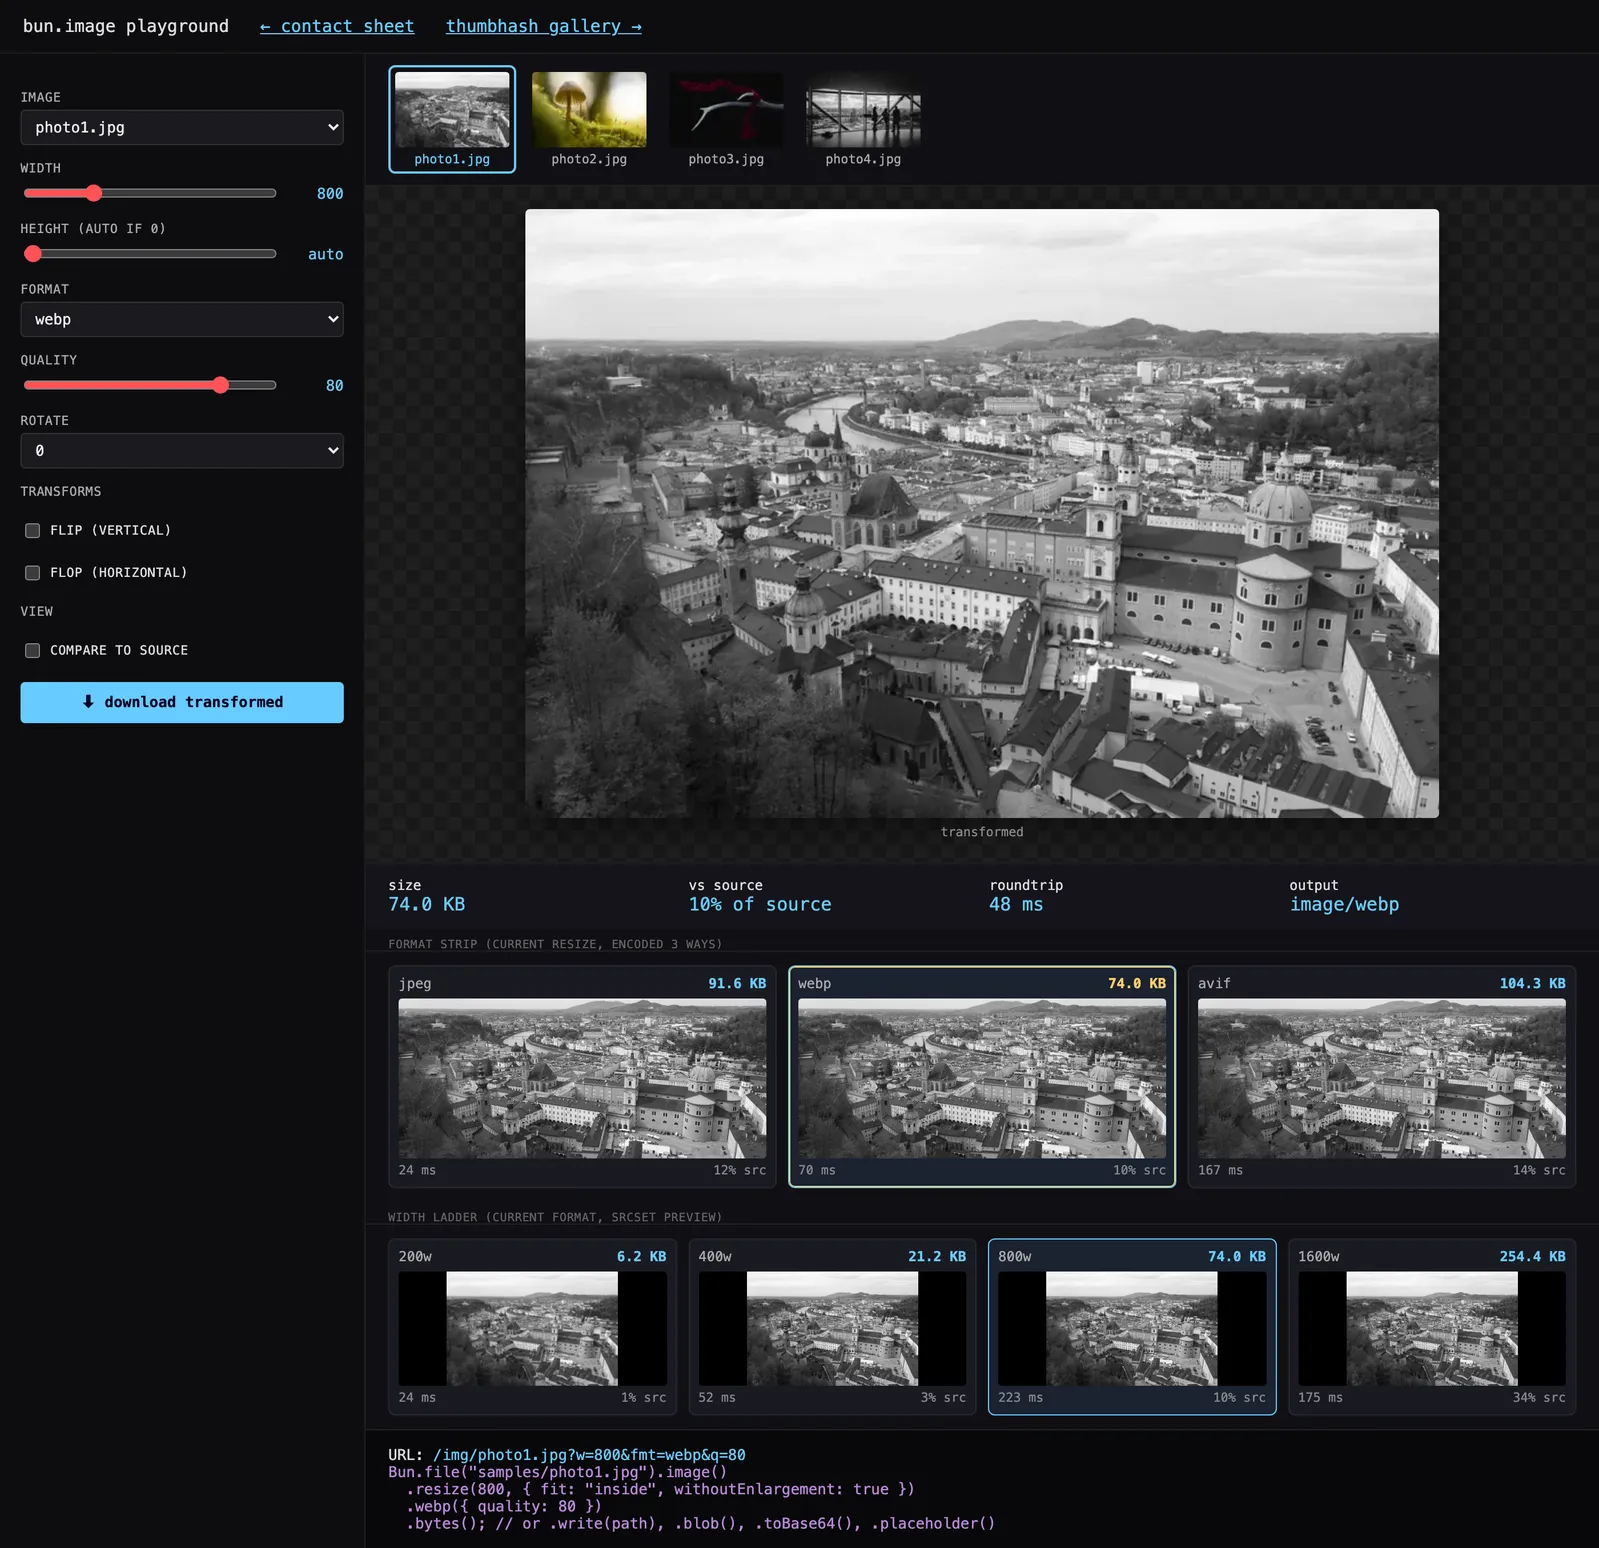
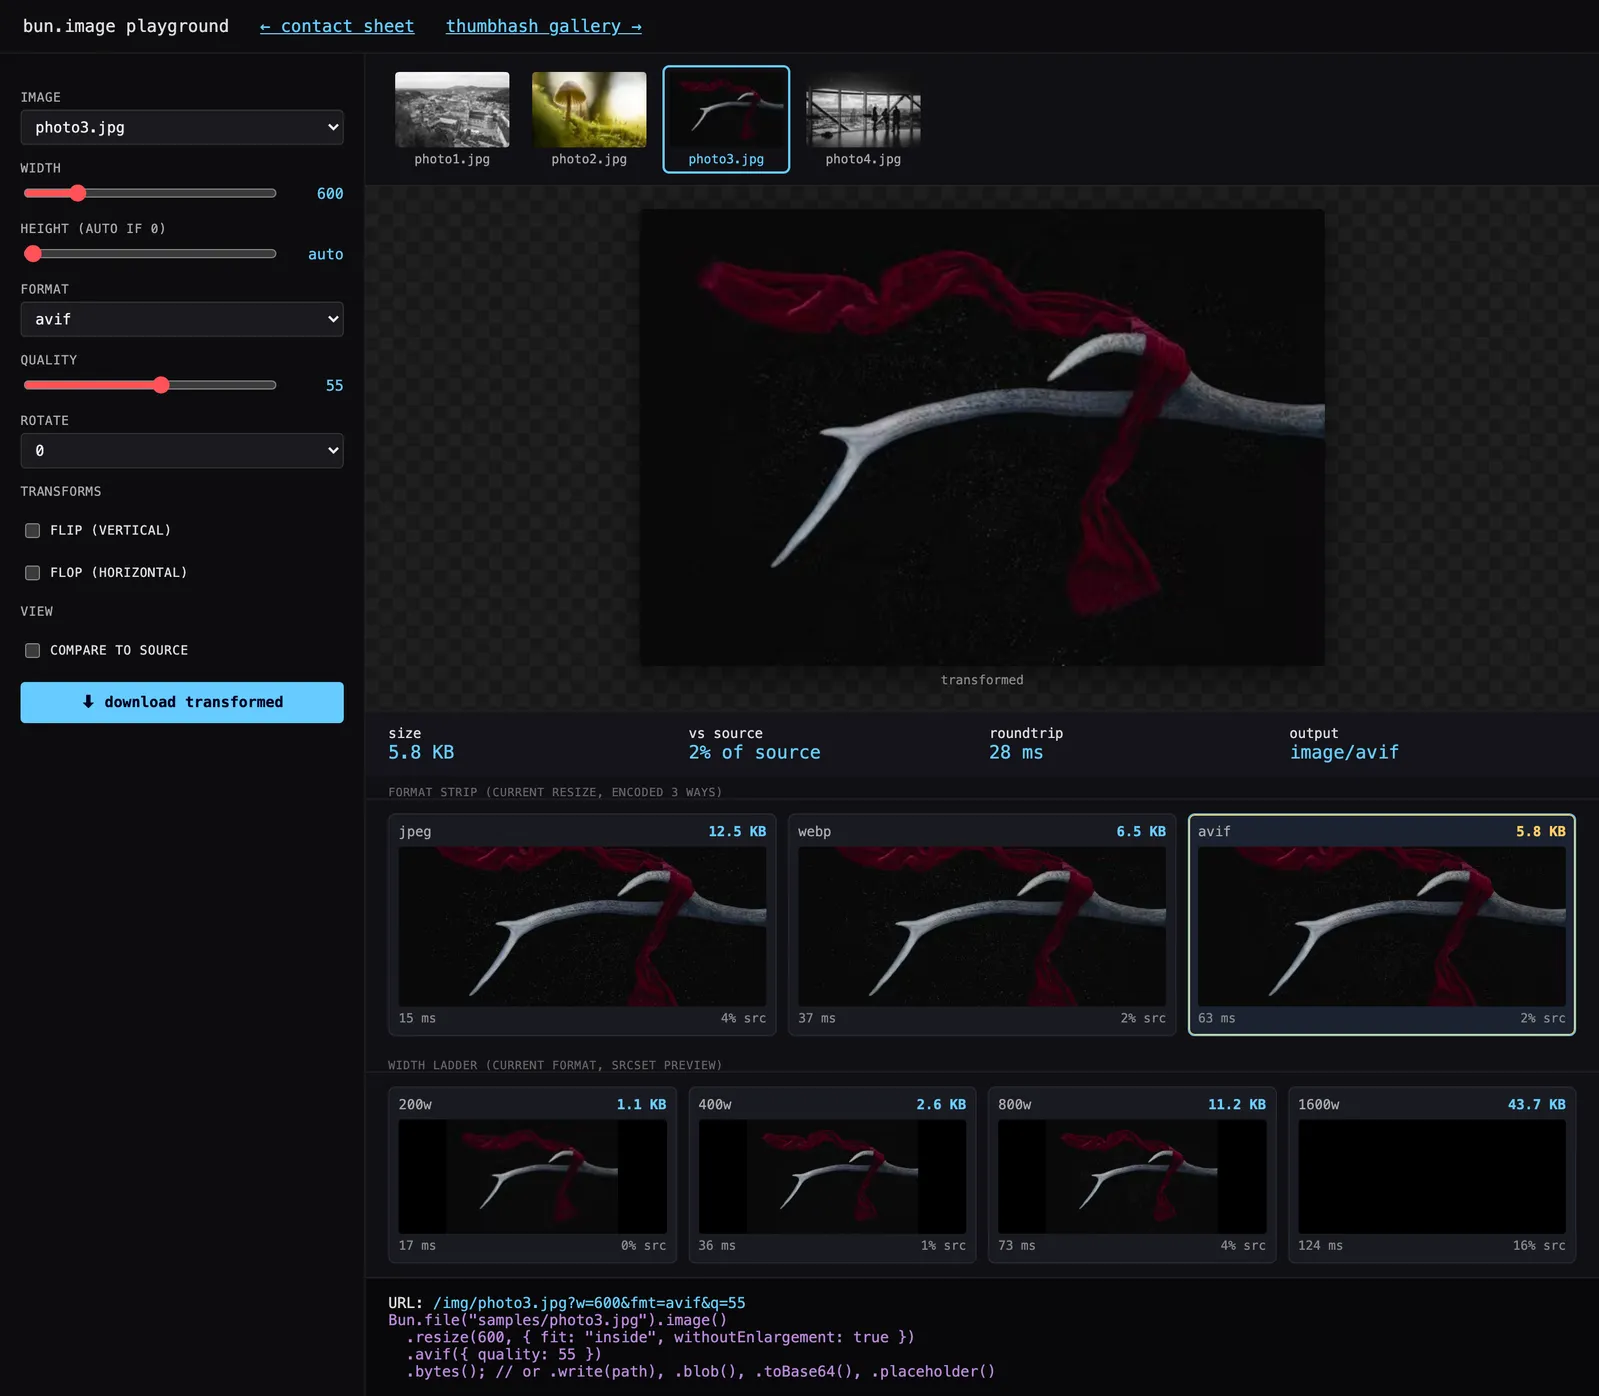
The format strip (jpeg/webp/avif side by side) and width ladder (200/400/800/1600 of the chosen format) both run as parallel fetches — you tweak any control and all three formats re-encode in parallel, faster than you can read the numbers. That’s the dev-loop value Bun.Image makes casual.
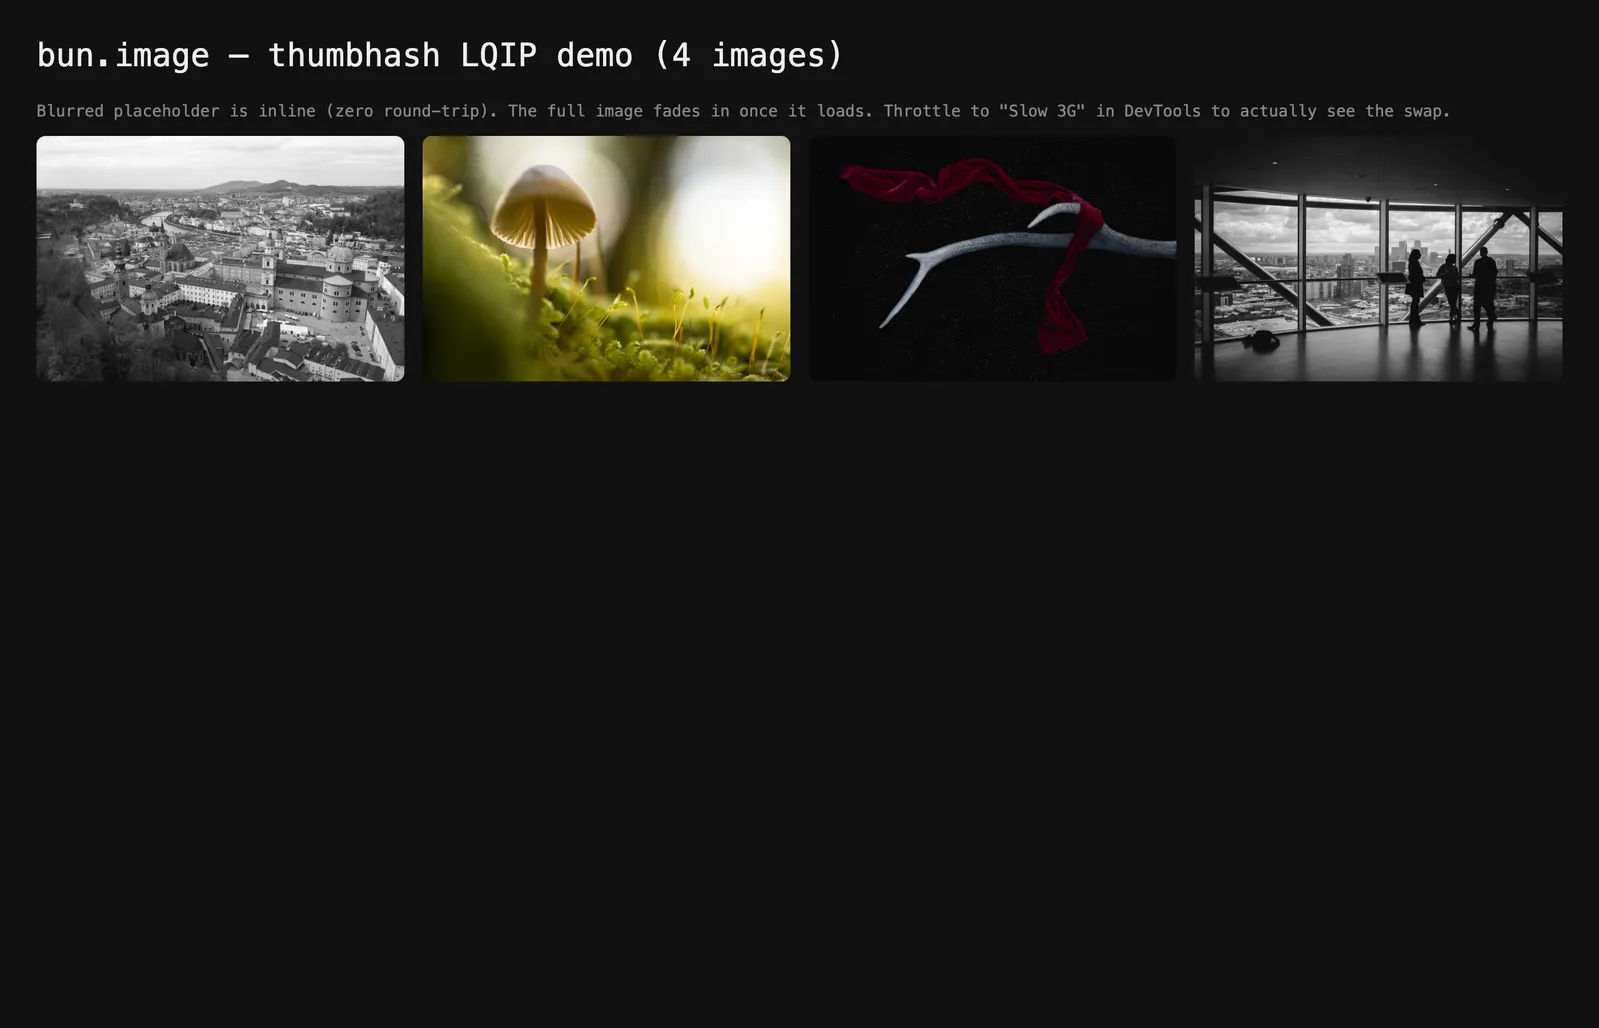
Demo 3 — ThumbHash gallery
This one is the sneaky-good feature of the API. The “blurred preview while the real image loads” pattern (Next.js Image, Medium) normally requires the thumbhash or blurhash npm package + a Sharp pipeline to generate the placeholders at build time.
Bun gives you a .placeholder() method that returns a data:image/png;base64,... URL in one call — a ThumbHash-rendered ~32px blur, typically 100–1500 bytes. Drop it straight into <img src=...>.
const lqip = await Bun.file("photo.jpg").image().placeholder();
// "data:image/png;base64,iVBORw0KGgoAAA…"  ← 200 bytes, ready to inline
The script walks samples/, generates LQIPs, writes a gallery HTML with the blur → real-image swap pattern. Throttle to slow 3G in DevTools to see it in action.
Demo 4 — macOS clipboard transformer
Bun.Image.fromClipboard() on macOS and Windows. Take a screenshot, run a CLI alias, get a properly-sized WebP on your desktop.
const img = Bun.Image.fromClipboard();
if (!img) { console.error("no image on clipboard"); process.exit(1); }

await img.resize(1200, undefined, { withoutEnlargement: true })
  .webp({ quality: 85 })
  .write(`~/Desktop/clip-${ts}.webp`);
iOS/Android screenshots are 3000+ px wide and 2 MB. For pasting into Slack, Linear, or PRs that’s wasted bandwidth and triggers the recipient’s “compressing image…” spinner. This script makes it a bun clip alias.
One gotcha I hit
Bun.Image.fromClipboard() returns null when the clipboard has no image — it doesn’t throw. Easy to miss because the docs phrase it as “from clipboard,” not “from clipboard if any.” Always if (!img) … before chaining.
What’s in the playground (interactive part)
The server’s /playground route is the bit I’d actually open day-to-day:
- Source picker — clickable thumbnails of all sample images at the top. Click to switch source; everything below re-encodes.
- Controls — width, height, format (jpeg/png/webp/avif), quality, rotate, flip, flop. Live preview with 80ms debounce.
- Live stats — size, % of source, roundtrip ms, output Content-Type.
- Format strip — same source + resize encoded as jpeg/webp/avif in parallel. Smallest gets a yellow inner border (“best”); currently-selected gets a cyan border (“active”). Click any card to adopt that format.
- Width ladder — current format encoded at 200/400/800/1600. Click any card to snap the width to that value — your
srcsetladder previewed live. - Compare-to-source — toggle to split the preview into source-vs-transformed for visual quality comparison.
- Download — server sets
Content-Disposition: attachment; filename="photo1-400w-q70.webp"and the button triggers a real download. - URL hash persistence — every control change updates
location.hash. Copy the URL, share it, land on the same configuration.
The whole thing is one Bun.serve file plus a 200-line vanilla-JS frontend. No build step. No bundler. No dev server. You run it with bun run server.ts and open localhost:3000/playground.
Where it actually helps in development
Six real use cases, ordered roughly by how often I’ve actually wanted them:
Upload pipelines. User uploads a 12 MP phone photo; you want a 1600 px max-width WebP at q85 in storage. Three lines, no installs, identical output everywhere Bun runs:
await Bun.file(uploaded).image()
  .resize(1600, undefined, { fit: "inside", withoutEnlargement: true })
  .webp({ quality: 85 })
  .write(`storage/${id}.webp`);
LQIP / blur placeholders. .placeholder() is the actual time-saver here. Worth using even if you keep your existing image stack — pull it in just for this.
On-the-fly responsive images. Exactly what server.ts does. Instead of pre-generating five sizes per image and shipping them to S3, you serve one master file and let ?w=800&fmt=avif resolve at request time, cached at the CDN by URL.
The whole “image CDN” category (imgix, Cloudinary, imgproxy) is essentially this pattern as a service. For internal tools or small apps, a 120-line route replaces the SaaS.
Build-time asset processing. Anywhere you’d reach for sharp in a build script:
- OG card generation
- favicon ladders
- social previews
- README screenshots resized before commit
- app icons from a single 1024 px source
Screenshot workflows. Demo 4. Take a screenshot with ⌘⇧4-ctrl, drop a bun image-paste alias in your shell, get a properly-sized WebP ready to drag anywhere.
Format A/B testing in CI. The showdown.ts pattern, scripted. “Did our latest design change blow up image budgets?” — encode all assets in your repo, compare to last week’s baseline, fail the build if total bytes grew >10%.
Hard to do casually before Bun.Image because the tooling cost was too high for a one-shot check.
Where it isn’t (yet) the right tool
Color management with ICC profiles, sophisticated compositing or text overlay, animated GIF/WebP frame work, raw decoding for NEF/CR2/DNG. Typical web work almost never hits these; photo editors and print workflows still need a dedicated image library.
The pattern
Bun’s strategy is the runtime is the framework. Bun.serve for HTTP. bun:sqlite for SQLite. Bun.sql for Postgres. Bun.Image for images.
The capability you used to install is now a method on something you already have. For 90% of web work that’s the better trade — fewer packages, fewer build flags, identical output across every machine the code runs on.
Clone the repo, run bun run server.ts, open the playground. You’ll know in five minutes whether this fits your stack.
Repo: github.com/Nitzan94/bun-image-demo
Bun docs: bun.com/docs/runtime/image